Last week my roommate, Sierrane, stormed into my room proclaiming that we should build an igloo. She didn’t have to sell me on it, I was in.
The next day I stepped outside to see Sierrane shoveling a respectable quantity of snow and building a circular snowbank in our backyard.
I went to research igloo building a bit, what igloo style do we want? How do we make it look nice? How big should our igloo be? Any gotchas to be concerned about? I was surprised at how few pictures of backyard igloos there were on the internet. Pretty much all of Google’s results stem from a handful of (mostly Canadian-built) igloos, or commercial products one could buy.
It felt like an opportunity to be enshrined in glory, and that’s what we’re seeking in our igloo.
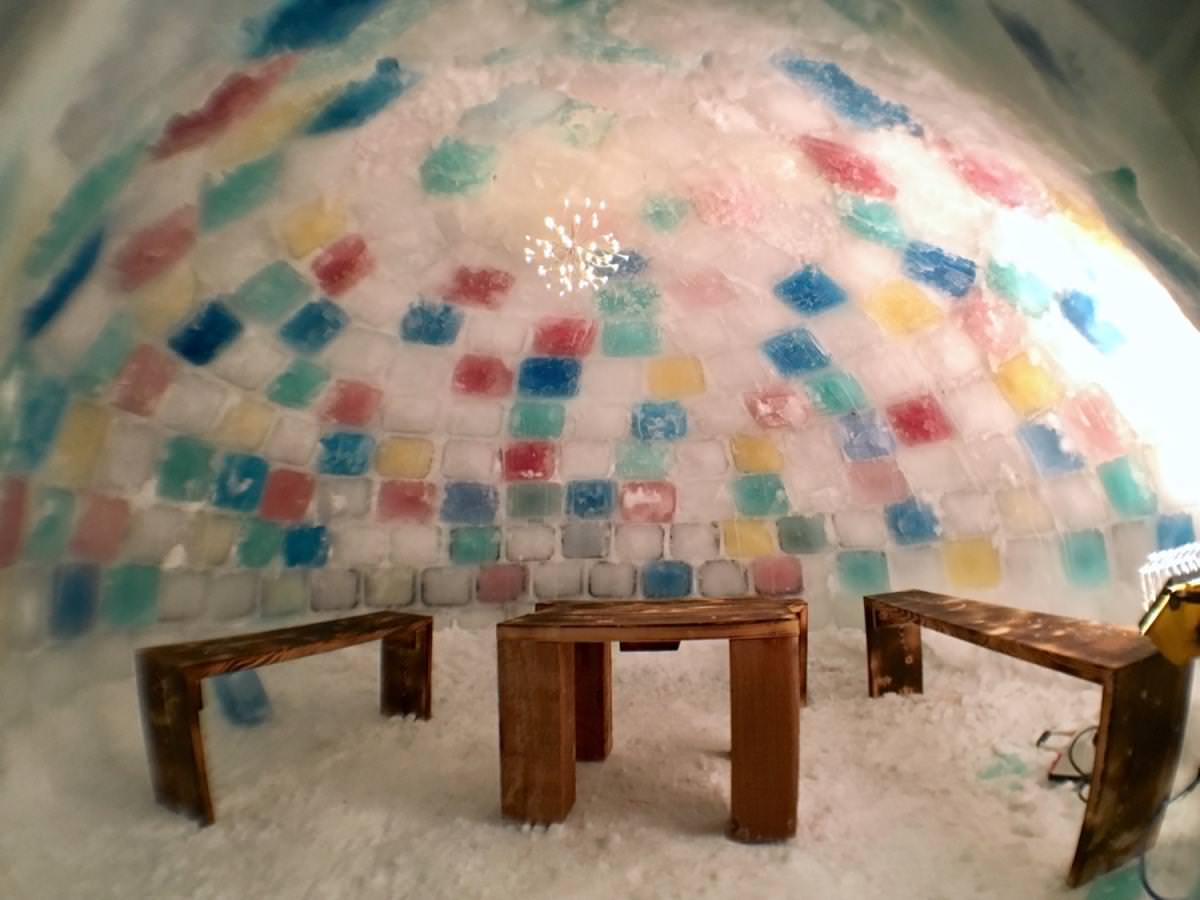
We are following the advice from one of the handful of igloo-builders we found online from Aaron Cyr of Manitoba, Canada, posted over at 50 Campfires. Aaron created the likes of this igloo in temperatures ranging from -40 F to -4 F:

It perhaps looks small from the picture, but with a few more perspectives, it’s actually quite roomie, and Aaron mentioned it can hold up to 8 people for a dinner party on the inside:

Our Igloo (Plans)
Sierrane’s and my igloo is going to be similarly sized, but a bit grander. Whereas Aaron’s igloo took about 250 ice bricks, we estimate ours, with an 8.5 radius and some additional flourishes, to be about 450 ice bricks.
We plan a fairly elaborate tunnel, a bit longer, but more narrow than Aarons, with an inclined ramp leading to the interior, which will drop about 12 inches into the ground below.
We’ve also created an alcove which juts out from the dome on one side and provides additional space for a built in ice bench (or as we more affectionately refer to it, our couch). In a few of our more ambitious moments, we’ve envisioned closing the abutment in the interior and fastening drapes to the ice, so that we have our own little closet, perfect for our teen angst 7 Minutes in Heaven games (followed, of course, by Spin the Bottle).
All that imagining aside, it should be a fairly impressive igloo. As a perfect (semi-) sphere, the ceiling will be more than 8 feet high, higher than rooms in some houses!
In our (my) mission of glory, I’m hoping we can reach out to The Isthmus or a local television station to do a story on our igloo around Valentines Day, as we intend to list (jokingly) on AirBnB for a romantic evening.
Progress & The Build Process
So far, we’ve laid around 42 bricks, which doesn’t even bring us to complete the base perimeter (maybe our calculations are low).
Making the bricks
The process of building the igloo involves taking aluminum turkey roasting pans and filling them with water, where they freeze over a period of about 48 hours (depending on the temperature).
We then remove them from the pans, re-fill the pans (freeze time is our bottleneck!) and then proceed to lay the frozen bricks.
Laying the bricks
Once the bricks are removed and placed near the perimeter of the igloo, like any good mason, we need to create our mortar.
The mortar is the key to the structural integrity of our type of igloo. The mortar is made from a mixture of snow and water, that creates a fast-freezing slush that we apply by hand in between the bricks (and for the first layer, to the earth).
The mortar serves two purposes:
- To secure each brick to one another
- To provide a strong, but more flexible glue between our brittle ice bricks.
The igloo is made from pure ice, which is notoriously strong but brittle. As the igloo will be subjected to a wide range of temperatures (though, all of them cold), wind and other environmental factors, it needs to be account for the freeze and thaw cycles incurred throughout a full 24 hours. The mortar provides the “flexible glue” to absorb the forces against the igloo.
Since I don’t have waterproof gloves �ȅ, Sierrane tapes plastic garbage bags over my gloved hands to prevent frostbite as we reach into the slush bucket and apply the mortar. It freezes over rapidly, and appears to be very strong (though this will be tested as the igloo grows).
Progress overall has been slow, as temperatures have risen in the days proceeding our start to the igloo. We typically don’t lay the bricks at night, but save that work for the weekends, and instead focus on the brick manufacture throughout the week.
I’ll post regular updates between now and Valentines Day as we embark on this exciting Winter adventure.
Stay tuned!
by Taylor